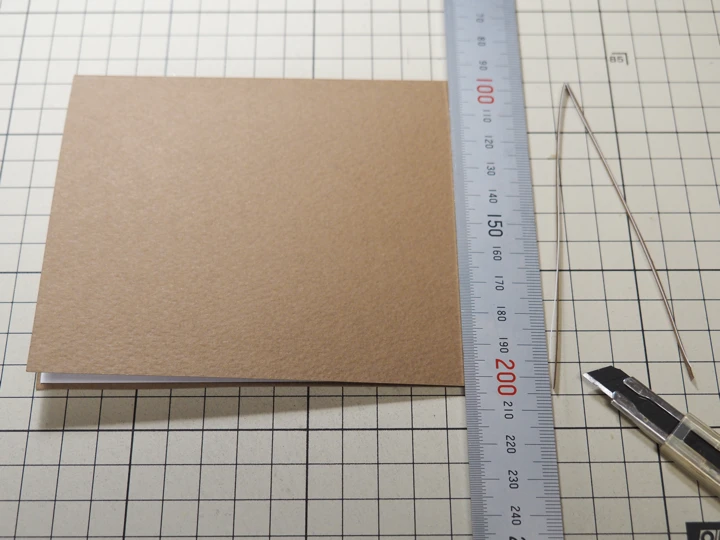
 Please prepare these tools. (I am writing about items available in Japan.)
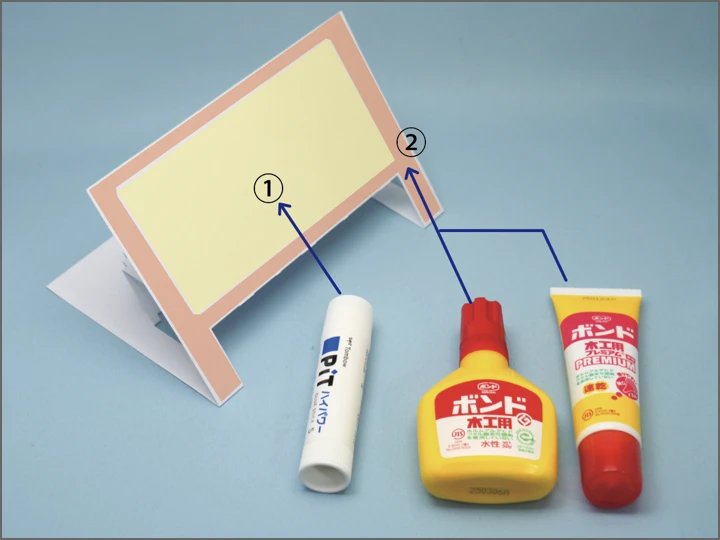
[Tools]From the top right of the photo,
Please prepare these tools. (I am writing about items available in Japan.)
[Tools]From the top right of the photo,
* Wood glue
(Two tubes with different tip thicknesses are shown, but one easy-to-use tube is sufficient)
* Glue stick
* Masking tape
* Either a triangle ruler or a straightedge (About 15cm is sufficient)
* Cutting mat
* Cutter knife
(Two are shown in the photo, but one easy-to-use cutter is sufficient)
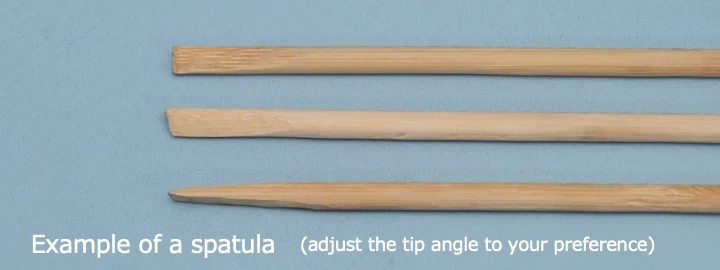
* Small spatula
(I made mine by flattening the tip of a bamboo chopstick. Useful for pushing from the inside or applying pressure. Handy to have.)
* A sewing awl or needle punch with a sharp tip that can apply pressure
(for creating fold lines)
* Tweezers
(useful for folding detailed patterns)
* Steel ruler (used for trimming edges during finishing)
 [Materials (Paper)]
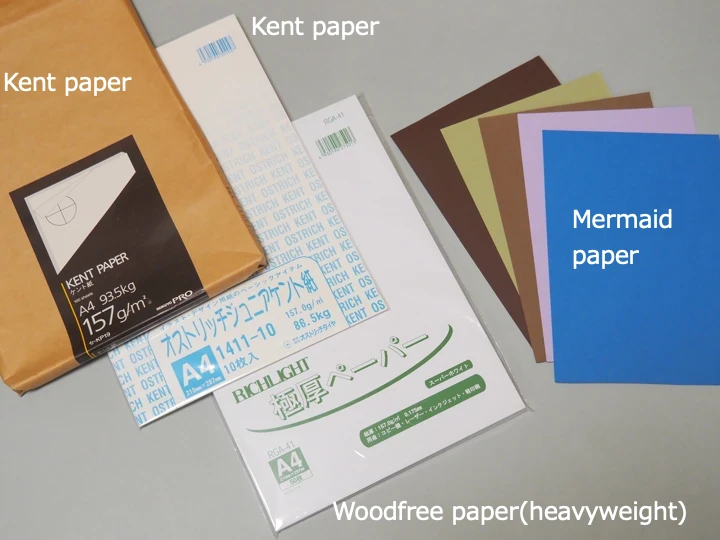
* Inner paper (A5 size): White paper with some stiffness, such as Kent paper.
A4 is commonly available, so cutting it in half yields A5. I use Kent paper with a thickness of 157.0g/m² and heavy-weight woodfree paper (157.0g/m²).
* Pattern printing paper (B5 size plane paper)
* Cover paper: Slightly thicker colored drawing paper.
Make it a few millimeters larger than A5 size; this reduces the amount of Kent paper you need to trim later. I've been using Mermaid paper (153kg ream weight) recently.
On this website, the paper size for the works is A5. That the finished work can be mailed in a standard envelope.
Print the pattern on separate sheets (B5 plain paper) and cut two pieces at once. Since it doesn't print directly on the Kent paper, the finished product looks cleaner.
Print the pattern on plane paper. The pdf file of pattern is fitted to B5 size paper. (B5 size is Japanese size 182mm x 257mm.) Please use the paper which you are easy to use.
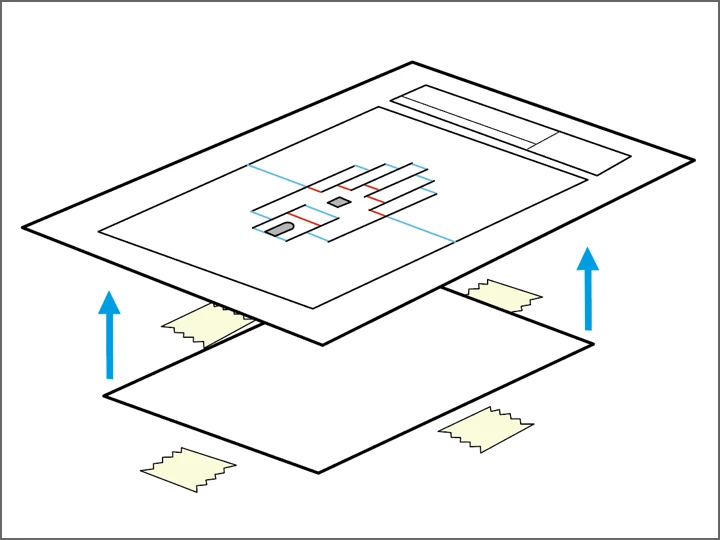
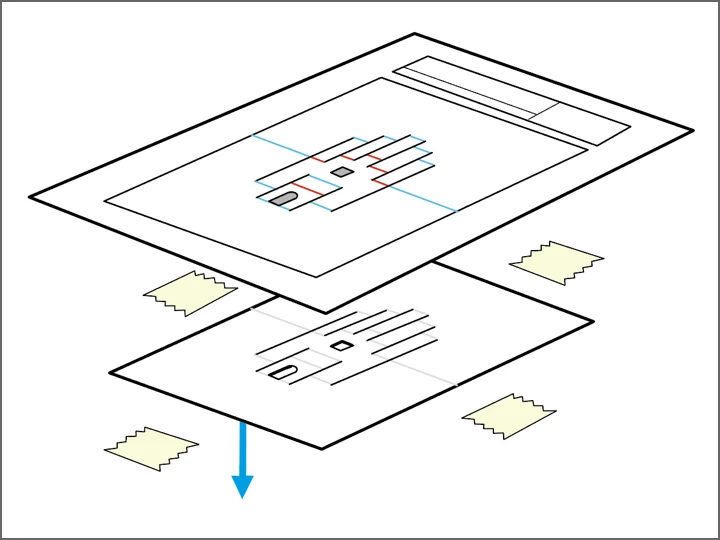
Attach Kent paper to the back of the printed pattern. Align it with the frame labeled “A5” on the pattern. Secure it at all four corners with masking tape to prevent shifting during assembly.
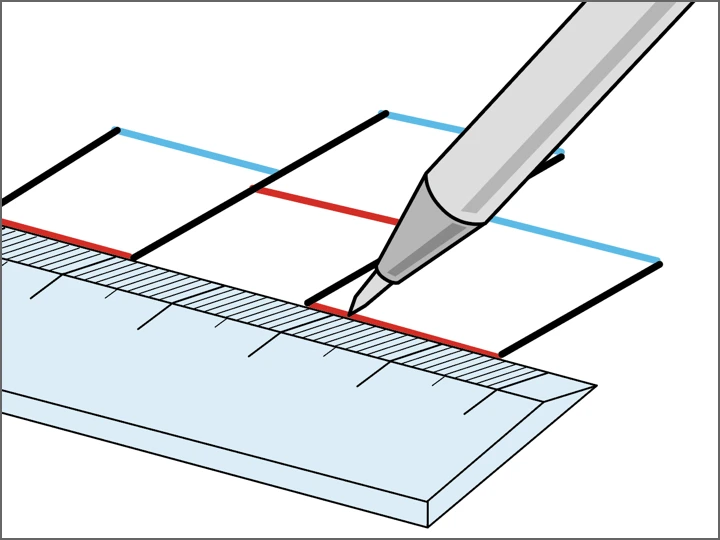
To make folding easier, score the Kent paper. Align a ruler with the fold lines on the pattern (red and light blue lines), then use a pointed tool like an awl or punch to firmly draw a line. Apply enough pressure to create a slight indentation on the Kent paper below.
* Always use a ruler.
* Pointed tools may tear the paper if held straight. Tilt them at an angle when drawing the line.
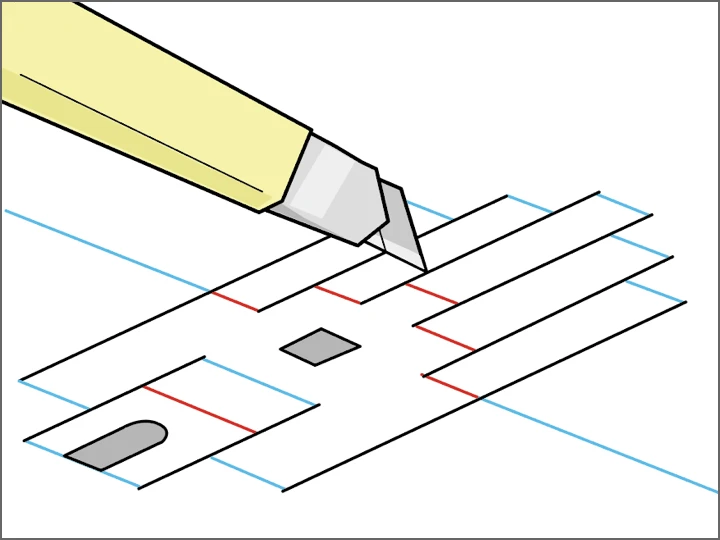
Next, use the cutter to cut along all the solid black lines.
The lines only indicate “notches,” while the gray-shaded areas indicate “cutouts.” Since it's double-layered, make sure to cut all the way through to the bottom Kent paper.
If you miss a cut, you won't be able to fold it. Make sure you've cut all the lines before peeling off the tracing paper.
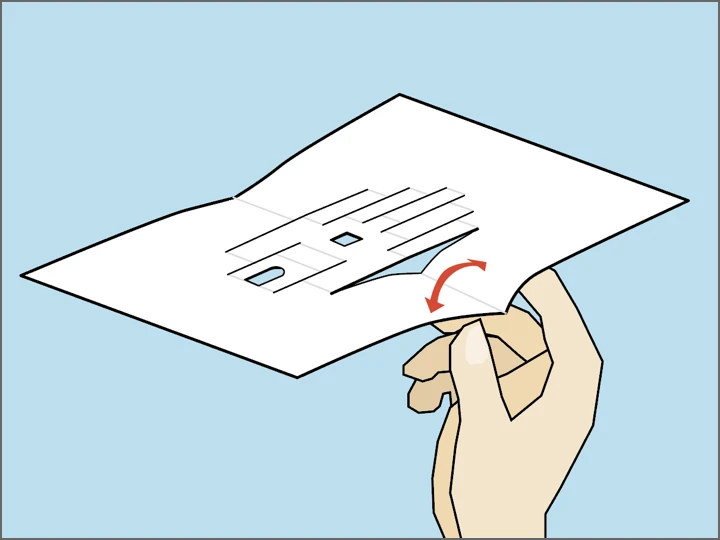
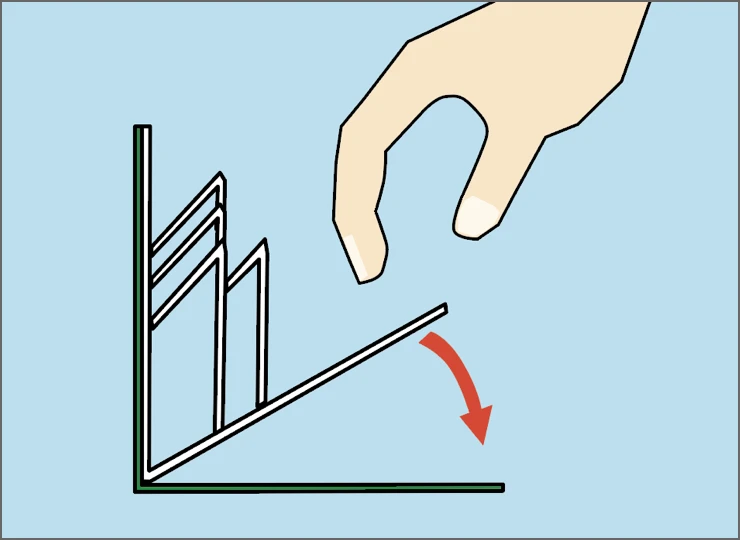
Fold the Kent paper along the crease lines, but you can't fold it all at once from the start. Gradually build creases wherever possible. For wider sections, you can fold them by pinching with your fingers, but for narrower sections, lightly pressing with your fingertips makes it easier to set the crease.
If you fold with too much force, you'll create unwanted creases in unintended places, so proceed carefully, adjusting your pressure as you go.
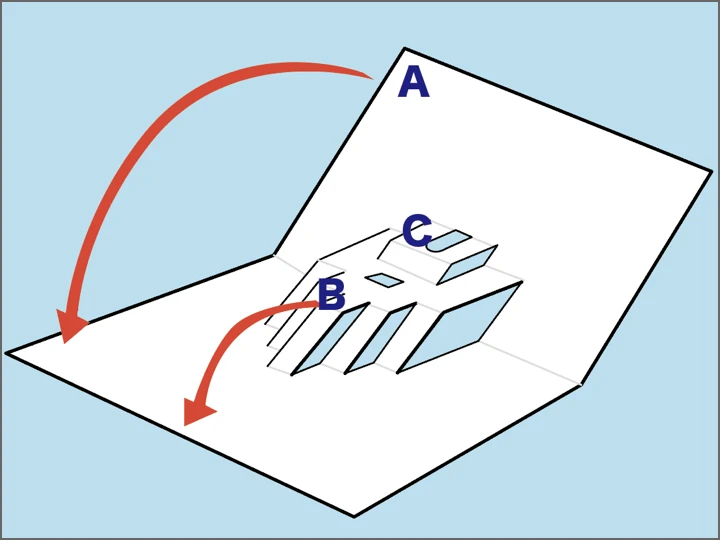
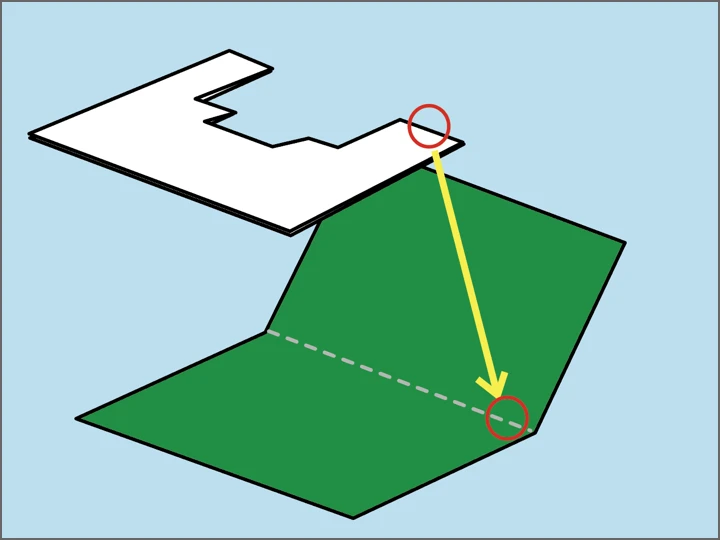
Once a general crease pattern has formed, place the Kent paper on a flat surface. Slowly lift section "A" toward you while pinching section "B" (or pushing it out from behind) and pulling it toward you.
Once section "B" is fully pulled toward you, firmly press it flat. Keeping your finger on section "B", now pinch section "C" and pull it toward you. Press section "C" flat in the same way as section "B", then finally press the entire section "A" firmly flat.
If parts "B" or "C" are difficult to hold by hand, use tweezers to pull them out or push them out from the back with a spatula.
When fully folded, it becomes flat as shown in the diagram.
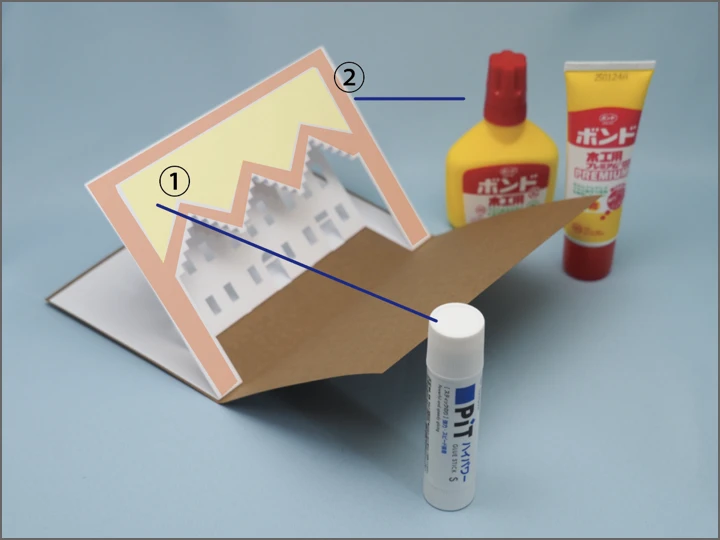
Next, attach colored construction paper to the outside.
Fold the cover paper in half, then align the fold lines of the white paper and cover paper, and glue them together. It's easier to do this with the cover paper folded at about a 90° angle.
Apply adhesive to one side at a time.
While stick glue is convenient and doesn't wrinkle, its adhesive strength can sometimes be weak. That's why I use wood glue only around the edges. Apply the stick glue first, then apply the wood glue. (Quick-drying types dry too fast, so I find non-quick-drying glue easier to work with.)
If the area near the fold isn't properly glued, it may not open and close smoothly. So, make sure to apply the glue all the way to the edge of the paper.
Apply stick glue and wood glue to the opposite side in the same manner. (Be careful not to get adhesive on unnecessary areas.)
As shown in the left diagram, if you glue it at an angle of about 90 degrees, it will look neat when both opened and folded.
After pasting, trim the edges slightly to align the edges of the Kent paper and colored paper since they are misaligned.
Place a steel ruler against the edge and cut with a cutter knife, but be careful as the ruler can easily slip. The point is to apply more pressure with the hand holding the ruler than with the hand holding the knife.
Hold the ruler firmly to prevent shifting (and avoid cutting your hand), and cut slowly.
Don't press too hard on the knife. Normal pressure is sufficient for cutting. (If it doesn't cut through in one pass, simply cut the same line again.)
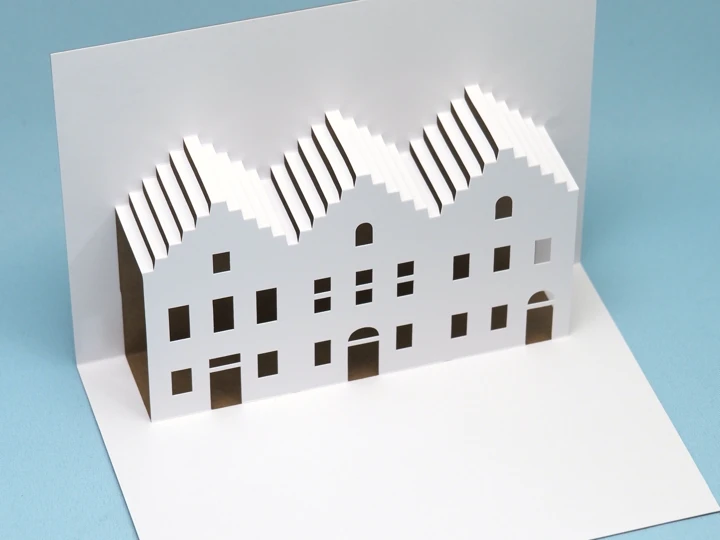
That's it, all done.